Install Plastic Wall Panels: How to Easily Install Plastic Wall Panels in Your Home
Install Plastic Wall Panels: How to Easily Install Plastic Wall Panels in Your Home When it comes to enhancing the aesthetics and functionality of your home, plastic wall panels can be an excellent choice. They are durable, easy to clean, and come in a variety of designs, making them suitable for different styles and settings….
Install Plastic Wall Panels: How to Easily Install Plastic Wall Panels in Your Home
When it comes to enhancing the aesthetics and functionality of your home, plastic wall panels can be an excellent choice. They are durable, easy to clean, and come in a variety of designs, making them suitable for different styles and settings. Whether you are looking to renovate a bathroom, kitchen, or any other part of your home, installing plastic wall panels can be a straightforward DIY project. In this article, we will guide you through the installation process, ensuring that you achieve excellent material performance while transforming your living space.
Before you begin, it is important to gather your materials and tools. You will need plastic wall panels, a utility knife, a measuring tape, a level, adhesive suitable for plastic, caulk, a caulking gun, and a straight edge. If you prefer a more secure installation, you might also consider using screws and furring strips, especially if you are working on uneven walls.
The first step in the installation process is to prepare the wall surface. Ensure that the wall is clean, dry, and free of any debris. If you are installing the panels over existing tiles or wallpaper, make sure they are firmly adhered to the wall. If there are any loose or peeling sections, remove them to create a smooth surface for the panels. It is also advisable to repair any holes or imperfections in the wall before proceeding.
Next, measure the dimensions of the wall where you plan to install the panels. Accurate measurements are crucial for ensuring a snug fit. Once you have your measurements, mark the wall lightly with a pencil to indicate where each panel will be placed. A level will help you maintain straight lines, ensuring that your panels are aligned properly.
Now, it is time to cut the plastic wall panels to the appropriate size. Using a utility knife and a straight edge, carefully score the panel along the marked line. Once you have scored the panel, you can snap it along the line for a clean break. Make sure to wear safety goggles and gloves during this process to protect yourself from sharp edges and debris.
After cutting the panels, it is time to apply the adhesive. If you are using the adhesive method, apply a generous amount of adhesive to the back of the panel. Follow the manufacturer’s instructions for the best results. Press the panel firmly against the wall, starting from one corner and working your way across. Use the level to ensure that each panel is straight as you continue the installation. For added security, you can place small screws along the edges of the panel, but make sure to pre-drill the holes to avoid cracking the plastic.
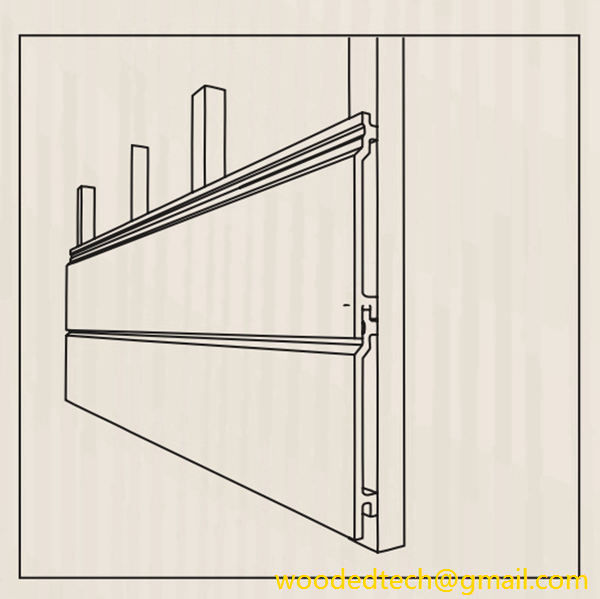
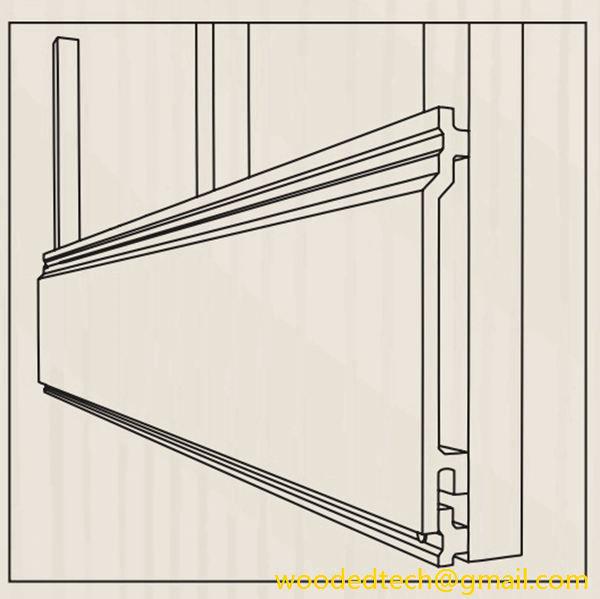
If you are using furring strips for added support, install them vertically on the wall at regular intervals, ensuring they are level. Then, attach the panels to the furring strips using screws. This method is particularly beneficial in areas with high moisture content, such as bathrooms and kitchens, as it provides additional stability and helps prevent warping.
Once all the panels are installed, it is essential to seal the edges. Use caulk in the joints between the panels and around the perimeter of the installation to prevent moisture from seeping behind the panels. This step is particularly important in areas exposed to water, as it helps maintain the integrity of the installation and ensures long-lasting performance. Smooth the caulk with your finger or a caulking tool for a clean finish.
After sealing the edges, allow the adhesive and caulk to cure according to the manufacturer’s recommendations. This waiting period is crucial, as it ensures that the panels are securely attached and that the caulk has set properly.
Once everything has cured, you can add finishing touches to your newly installed plastic wall panels. Consider painting any exposed edges or adding trim for a polished look. If your panels are textured or patterned, you may want to leave them as they are to showcase their unique design.
In conclusion, installing plastic wall panels in your home is an accessible and rewarding project that can greatly enhance your living space. With their durability, ease of maintenance, and aesthetic appeal, plastic panels offer excellent material performance. By following these steps—preparing the wall surface, measuring and cutting the panels, applying adhesive or using furring strips, sealing the edges, and allowing for adequate curing time—you can achieve professional-looking results with minimal effort.
Whether you are updating a single room or undertaking a larger renovation, plastic wall panels can provide an effective and attractive solution. Embrace your creativity and enjoy the transformation of your home with this practical and stylish option.

