Install Composite Deck Railing: A Guide to Installing Composite Deck Railing for Safety
Install Composite Deck Railing: A Guide to Installing Composite Deck Railing for Safety Installing composite deck railing is an essential aspect of enhancing the safety and aesthetic appeal of your outdoor space. Composite materials have gained immense popularity due to their durability, low maintenance, and resistance to weather elements. This guide will walk you through…
Install Composite Deck Railing: A Guide to Installing Composite Deck Railing for Safety
Installing composite deck railing is an essential aspect of enhancing the safety and aesthetic appeal of your outdoor space. Composite materials have gained immense popularity due to their durability, low maintenance, and resistance to weather elements. This guide will walk you through the process of installing composite deck railing, focusing on ease of installation while ensuring safety and security.
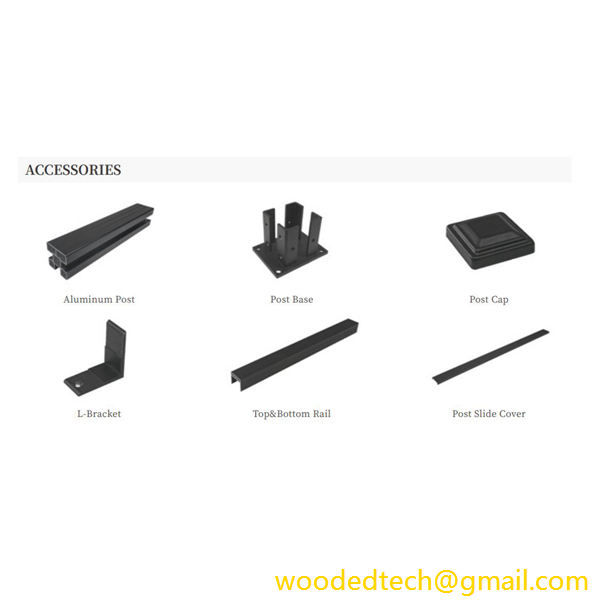
Before diving into the installation process, it is important to gather all necessary materials and tools. You will need composite railing sections, posts, post caps, brackets, screws, and a level. Tools required include a drill, saw, measuring tape, and safety gear such as gloves and goggles. Proper planning and preparation will make the installation process smoother and more efficient.
The first step in installing composite deck railing is to determine the layout of your railing system. Measure the length of the area where the railing will be installed, taking note of any steps or corners that may require special attention. It is crucial to ensure that the railing design complies with local building codes and regulations, which typically dictate the height and spacing of the railing.
Once you have your measurements, the next step is to install the posts. Posts are the vertical supports that will hold the railing in place. Start by marking the locations for your posts along the perimeter of your deck. The spacing between the posts will depend on the type of composite railing you are using, but a common distance is between 6 to 8 feet. Using a post hole digger, create holes for the posts, ensuring that they are deep enough to provide stability. Typically, a depth of at least 24 inches is recommended, but check your local codes for specific requirements.
After digging the holes, insert the posts and fill the holes with concrete or compacted gravel to secure them in place. It is important to ensure that the posts are plumb and level before allowing the concrete to set. Use a level to check that each post is perfectly vertical. Once the concrete has cured, you can move on to the next step.
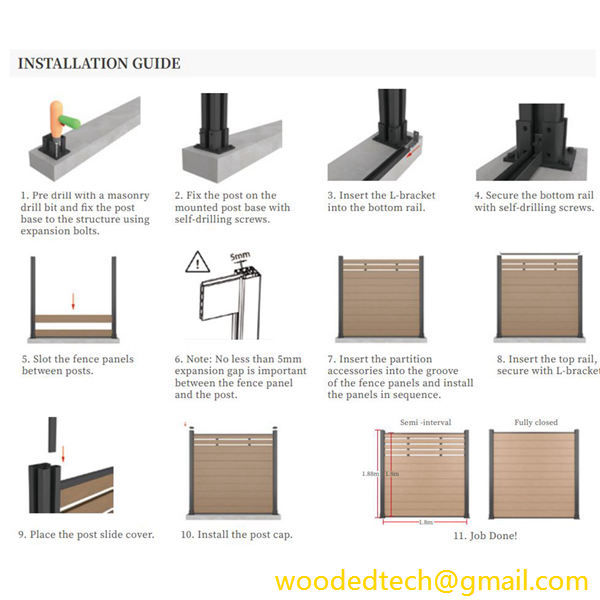
With the posts securely in place, you can now install the railing sections. Begin by attaching the bottom rail to the installed posts. The bottom rail serves as a foundation for the rest of the railing system. Use brackets to secure the bottom rail to the posts, ensuring that it is level. It is important to follow the manufacturer’s instructions for the specific composite railing system you are using, as different products may have unique installation requirements.
After the bottom rail is installed, you can proceed to install the top rail, which adds an additional layer of safety and stability to the railing system. Similar to the bottom rail, use brackets to secure the top rail to the posts, making sure it is level and properly aligned with the bottom rail. The top rail not only enhances the visual appeal of the railing but also provides a sturdy grip for individuals using the deck.
Next, you will need to install the infill panels or balusters, which are the vertical elements that fill the space between the top and bottom rails. These panels help prevent falls and enhance the overall safety of your deck. Depending on the design of your composite railing system, you may have different options for infill, such as glass panels, stainless steel cables, or traditional balusters. Ensure that the infill materials are installed according to the manufacturer’s instructions, maintaining the required spacing for safety.
Once all components are securely in place, take a moment to inspect your railing system. Check for any loose screws or brackets and tighten them as necessary. It is crucial to ensure that every element of the railing is secure and stable to provide maximum safety for you and your guests.
Finally, consider adding finishing touches to your composite deck railing. This could include decorative post caps that enhance the aesthetic appeal of your railing system or lighting fixtures that provide illumination for evening gatherings. These additions can transform your deck into a beautiful and functional outdoor space.
In conclusion, installing composite deck railing is a straightforward process that can greatly improve the safety and appearance of your deck. By following this guide and ensuring that you adhere to local building codes, you can successfully install a durable and visually appealing railing system. The key to an easy installation lies in proper planning, preparation, and attention to detail.
Whether you are a seasoned DIY enthusiast or a beginner tackling your first home improvement project, taking the time to install composite deck railing correctly will yield lasting benefits for years to come. Enjoy your newly installed railing, knowing you have created a safe and attractive space for relaxation and entertainment in your backyard.

